Today we are going to see how to set up a Samba server on a VPS through Webmin.
Need to share files between your Windows and Linux systems? Activating Samba on your VPS with Webmin can make it easy. In this step-by-step guide, we’ll show you how to activate Samba on your VPS with Webmin and start sharing files between systems.
A server that implements the Samba protocol allows us to exchange files between Windows and Linux, with both being either servers or clients. In this case, we will focus on setting up the server within our VPS and connecting through Finder on Mac OS.
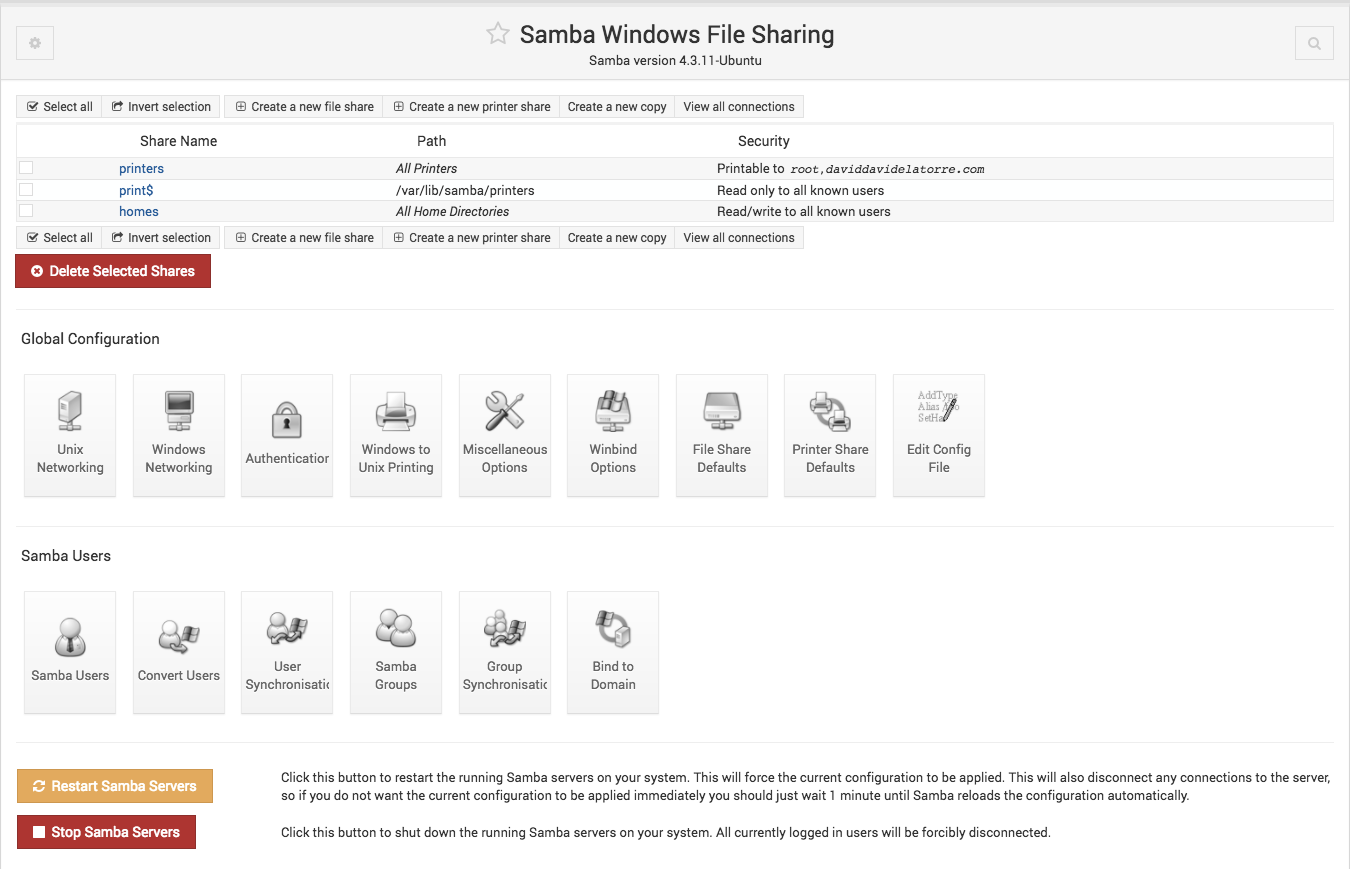
The first thing we need to do is access our server through Webmin and use the search feature to find Samba Windows File Sharing

We can access its configuration and install the service, and Webmin will take care of the rest. When the process is complete, we should have something like this.

Now that we have Samba installed on our server, we just need to configure it.
The first thing we need to do is establish which elements we want to share with the clients. Samba allows us to define different access domains and assign them to certain users or groups depending on our needs. In this case, we will give privileged user “Sam” access to the entire file system.
Samba users
To give access, it is necessary to create the user by entering the following commands in the VPS terminal:
useradd Sam
And assign a password with:
passwd <tu_contraseÑa>
</tu_contraseÑa>
The next step is to add this user to the Samba users, including our Unix user in the smbpasswd file. To do this, type the following instruction that will ask us for the password for our Samba user:
smbpasswd -a Sam
Now our user Sam is authorized to use Samba on our server. The next step is to create the domain where the user Sam will be authorized to do what we allow. Click on “Create new file share”.
Shared directories

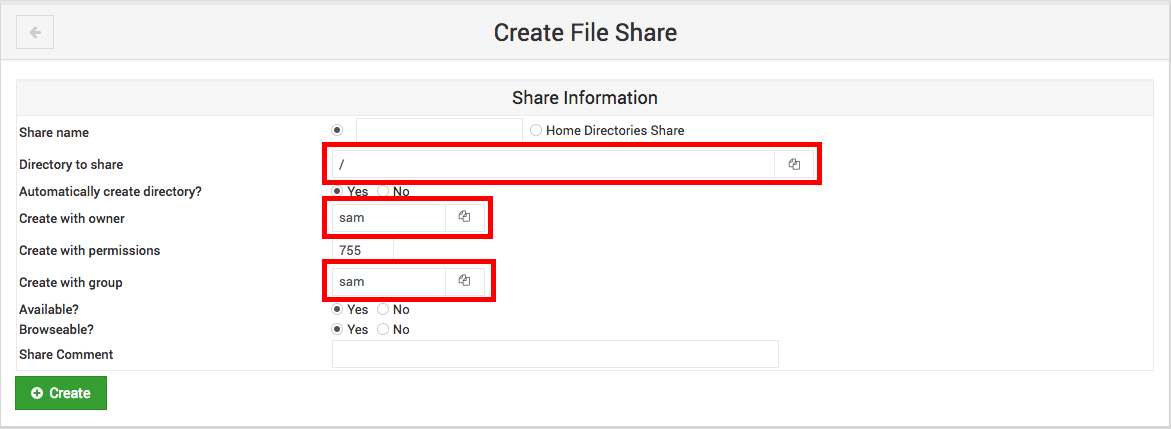
And we will open the configuration window of the shared file where we establish the root directory of our disk as the directory to share and the owner user of said shared directory. In this case, it is our user Sam.

Once created, we will have our shared directory in Samba. With this configuration, it is completely accessible. If we want to adjust certain security and permission parameters in the files, we should navigate within the configuration of our shared directory and set the parameters.
Finally, we just have to test the connection to our server. To do this, we open Finder in Mac OS X (or any program that allows connections with the Samba protocol) and enter the following address:
smb://el_nombre_de_tu_servidor
The server will ask us for a user and password, and we use Sam and the password we assigned in the smbpasswd file. We connect and enter the root directory of our server using the Samba protocol.
As you can see, it is extremely simple and allows us to access our server from anywhere in a completely secure way. I
if you want to comment on anything, do not hesitate to contact me through the contact form.